LUMBER STORAGE RACK
A wall rack that screws every upright to a stud. Set it below.
Size the rack: how many uprights, how many levels, how long an arm. It lands on every other stud at 16-inch spacing.
CAN I BUILD THIS?
2 steps. One morning.
SHOP
9 MATERIALS TO GET · 9 TOOLS TO GET
Drawn end-on. ClickTap anything you already have.
Lowe’s materials are $0.92 less for this build.
CUT LIST
6 BOARDS · 1 SIZE TO CUT
LABEL EACH PIECE
ClickTap a piece when it’s cut, clicktap again to undo.
2×4×8′ BOARDS
0 OF 12 CUTBUILD STEPS
2 STEPS
- REORIENT
- Plumb the upright with the level.
ABOUT THIS PLAN
Count the studs first. The rack never asks how wide you want it: it lands one upright on every other stud at 16″ stud spacing. That is three of them across 67″ of wall on yours, and no arm ever ends up screwed to drywall. On a 24″-stud wall, put an upright on every stud instead; nothing else changes.
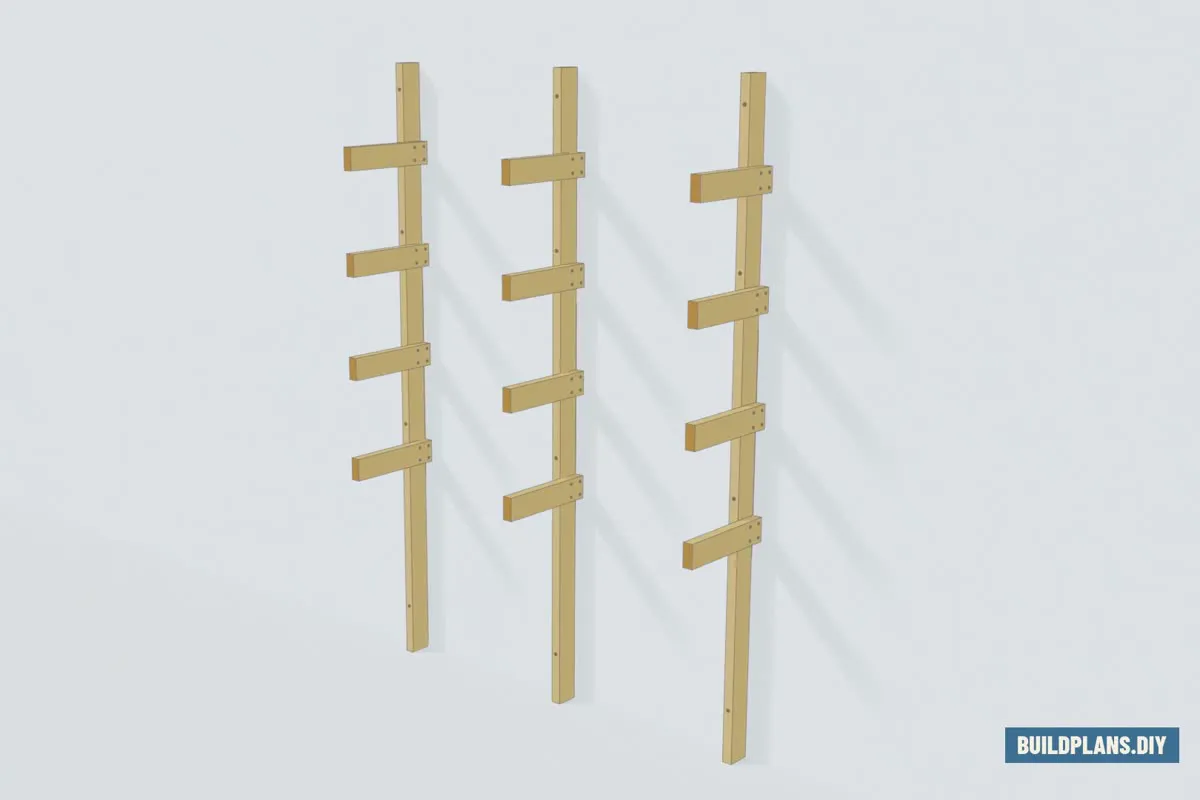
Every upright is a whole 8-foot 2×4, uncut, standing on its narrow edge on the floor so its top wall screw sits 92″ up. The floor carries the weight and the four 6″ structural screws only hold it to the wall. Arms lap onto the right side of their upright with four screws in shear, spread to the edges of the lap, and that screw group holds each arm level, so every level is open from the wall to the arm tip. Levels hang from a top arm fixed at 84″ and stack downward, so a two-level rack leaves open floor beneath it. Every screw goes into a stud.
COMMON QUESTIONS
Does it really have to go into studs?
Yes. Every upright, every wall screw, into a stud. A loaded arm pulls the top of its upright away from the wall. This rack is not for drywall anchors, and it is not for a wall you can’t screw into (masonry, metal studs, a rented garage). A rack that stands on the floor is a different plan. Find the studs first with a stud finder, then build.
My studs are 24″ apart, not 16″. Can I still build it?
Yes. Land an upright on every stud instead of every other one: the uprights sit 24″ apart, the same three uprights cover less wall, and the arms, the cuts and the screws stay exactly the same. If your studs are some other spacing (older houses can be), find them with a stud finder and put an upright on each one you mean to use.
Why no braces under the arms?
Because a 45° brace under every arm eats the storage. The space between one level and the next, right back to the wall, is exactly where a knee brace sits, so a braced rack holds less lumber per foot of wall and every board has to clear the brace on its way in and out. Here each arm laps onto its upright with four screws spread across the whole joint, ¾″ in from every edge, and that screw group is what holds the arm level.
Why won’t it let me pick five levels with long arms?
Because the levels sit as far apart as the arms are long (never closer than 16″), and the lowest arm has to clear the floor by 4″, so long arms run out of wall before they run out of levels: 16″ arms five, 20″ arms four, 24″ arms four. Want more levels? Take shorter arms.
How much weight will an arm hold?
Every arm is a 2×4 on edge held to its upright by four screws in shear, spread to the corners of a 3½″ square. With no brace, that spread is the joint’s leverage, which is why the plan puts the screws where it does and why a missing one matters. The other half of the question is the wall: a 6″ structural screw with two inches into a sound stud holds a great deal, one into a split stud or a missed one holds nothing, and we can’t see your wall from here. Nobody has load-tested this rack. Find the studs, drive all four, and keep the heavy stock on the lower levels, pushed back against the wall.
Why do the uprights stand on their narrow edge, and why 8 feet?
On edge, an upright shows a 3½″ face to the side: the face every arm laps onto with four screws driven straight through side grain into the arm’s face, with room to spread them out. Flat to the wall, an arm could only butt into 1½″ of board, and that joint is more likely to shear off. Eight feet because that is the board: the upright is one uncut 2×4, so there is nothing to measure and the top wall screw sits as high as it can go, which is what keeps a loaded rack from tipping off the wall.
Why is a 2×4 not actually 2 inches by 4 inches?
The name is the size before the mill dries and planes it. Every board sold as a 2×4 really measures 1 1/2″ × 3 1/2″, the uprights and the arms, all of it. The screw marks on this page already come from the real 3½″ face: four screws, 3/4″ in from each edge, and the numbers you mark are the numbers as written.
Can I add a level later?
Yes, and nothing you built moves. Levels stack down from the top arm, so a new level always goes on below the lowest one: one more arm per upright, screwed on from the right like the rest, as long as the floor leaves room for it.