2×4 OUTDOOR BENCH
A backless bench for the porch rail or the gap between two planters. Set the length and the seat height, and every board, cut and screw follows.
Set the length and seat height. The bench plans recalculate
CAN I BUILD THIS?
6 steps, every cut square. One afternoon.
SHOP
10 MATERIALS TO GET · 7 TOOLS TO GET
Drawn end-on. ClickTap anything you already have.
Lowe’s materials are $1.91 less for this build.
CUT LIST
7 BOARDS · 4 SIZES TO CUT
LABEL EACH PIECE
ClickTap a piece when it’s cut, clicktap again to undo.
CEDAR 2×4×8′ BOARDS
0 OF 16 CUT- A: Apron
- B: Leg
- C: Seat slat
- D: Frame seat support
- E: Lower rail
- F: Seat support
- G: Stretcher
BUILD STEPS
6 STEPS
- OPTIONAL GLUE
- OPTIONAL GLUE
That flush edge is the TOP: the frame stands on it in the next step.
ABOUT THIS PLAN
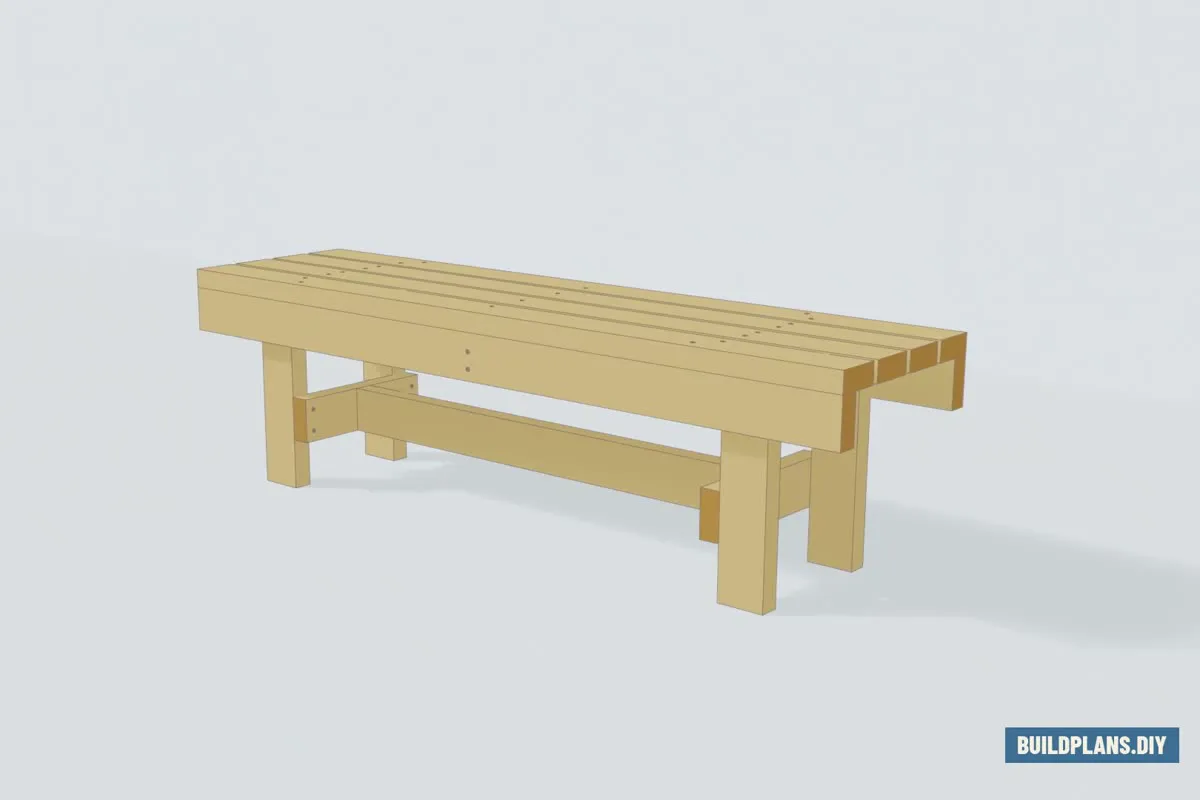
This plan makes a bench that perfectly fits your spot. Provide the length and the seat height, and the plan customizes the shopping list, cut list, and build steps around them. At 60″ long that is 3 seat supports under four flat slats, 4 legs standing 6″ in from the ends, and 7 eight-foot boards on the shopping list.
The seat is four boards laid flat with half-inch gaps, so rain runs off instead of sitting. Under it a front and back apron stand on edge with seat supports between them never more than 24″ apart. Each end is an H-frame: two legs, a seat support lapped across their tops, and a lower rail lapped on 4″ off the ground. One stretcher ties it to the other end. The legs stand directly under the seat, so your weight goes straight down into the ground and the screws only hold the frame square. Past 72″ a third pair of legs goes in at the center; yours does not need it. Every joint is screwed with the same 2½″ exterior-rated star-drive screw, 52 in all.
COMMON QUESTIONS
Why cedar? Can I build it from pressure-treated?
The list prices cedar because it is the porch-bench wood: light, stable, takes an oil, and left bare it weathers to silver. Pressure-treated 2×4s build the same bench with the same count and the same screws. They arrive wet, so let them dry a few weeks before you oil or stain, and expect a little movement as they do.
Why do long benches get a third pair of legs?
Past 72″ the run between the two end frames gets long enough that a seat carrying two adults would start to sag. So this plan adds two legs and a seat support at the center automatically: no lower rail, since the apron box already holds them square. Your bench is 60″, so it stands on four.
How many does it seat?
2 adults, with 24″ of seating area each. The seat supports under the slats never sit more than 24″ apart, so no slat carries a sitter across a long open span. The legs stand directly under the seat with their tops flush to the apron tops, so the load goes down through end grain into the ground rather than hanging on screws. Two aprons on edge carry the run between the legs, and the lower rails and stretcher keep the whole thing from racking when someone sits down.
What sizes can it be?
Any length and seat height the sliders offer, the length in 2″ steps. The longest bench uses an eight-foot board whole, uncut. Make sure they’re 8 footers. The depth stays fixed: four 2×4s laid flat with half-inch gaps between them.
Why is a 2×4 not actually 2 inches by 4 inches?
The name is the size before the mill dries and planes it. Every board sold as a 2×4 really measures 1 1/2″ × 3 1/2″, and this plan is built on the real number: four slats at 3½″ plus three ½″ gaps is the 15 1/2″ seat, and every leg, support and rail length on this page already allows for it. Cut to the numbers as written and the aprons land flush with the outside slats.
Do I need glue, brackets, or a pocket-hole jig?
No. Every joint is a straight screw driven with a drill: one kind of screw at every joint, a 2½″ exterior-rated star-drive screw, with the bit in the box. The legs lap inside the aprons and the rails lap inside the legs, so every screw goes through face grain or into end grain with plenty of bite. Exterior wood glue on the laps is fine if you like it; the plan does not count on it.